DocumentationGetting started
Your first book
Open the manuscript you already have, choose a design, and get a print-ready PDF and an EPUB back. The whole path, once, in about twenty minutes.
Nueel is for the part that comes after the writing. You arrive with a finished manuscript — usually a Word document — and leave with the two files a shop asks for: a print-ready PDF for the paperback, and an EPUB for the ebook.
This page walks the whole path once, quickly, so you know what the shape of the work is. Every step has a page of its own with the detail.
Before you start
You need a manuscript in .docx or Markdown.
If your chapter titles use Word’s heading styles, they become your chapters directly. If they do not, titles that say “Chapter Four” are found from the wording instead, and you see the chapter count before the book is created. Importing a manuscript covers both paths and what each one misses.
The five screens
A book in Nueel is worked on across five screens, and they are the tabs along the top:
These are places, not a wizard. Nothing is locked, nothing has to be finished before you move on, and you will go back and forth between Formatting and Preview more than any other pair.
- Writing is the manuscript, with your chapters listed down the left.
- Formatting is the design: which theme, what size, how the type is set.
- Preview is the whole book laid out, page by page, as it will print.
- Details is the title, the author, the ISBN — what a shop matches the book against.
- Export checks the book against a shop’s rules and writes the files.
The path, once through
Bring the manuscript in
From the library, click Import and drop your
.docxfile on the panel.Before the book is created you are told how many chapters were found. Check that number against what you know your book to have: if it is wildly off, the manuscript had no heading styles, and Importing a manuscript explains what to do about it.
Importdrop the fileCreate the bookRead what came through
You land in Writing, with your chapters down the left in a panel called the outline. Scroll the first chapter and the last one.
What you are checking is that the italics survived, that your scene breaks are still there, and that the chapters begin where they should. Nothing about the look of it matters yet — that is the next step, and it changes everything at once.
Choose a design
Go to Formatting. The first panel is Themes: eighteen complete book designs, each shown as a real page of your own book rather than as a swatch.
Click one and the entire manuscript takes it — trim size, margins, typeface, how a chapter opens, what runs along the top of the page. Changing your mind is another click, so try three.
FormattingThemesThemes are grouped as Fiction, Non-fiction, Poetry and Illustrated. Start in the group your book belongs to; the differences within a group are real but small.
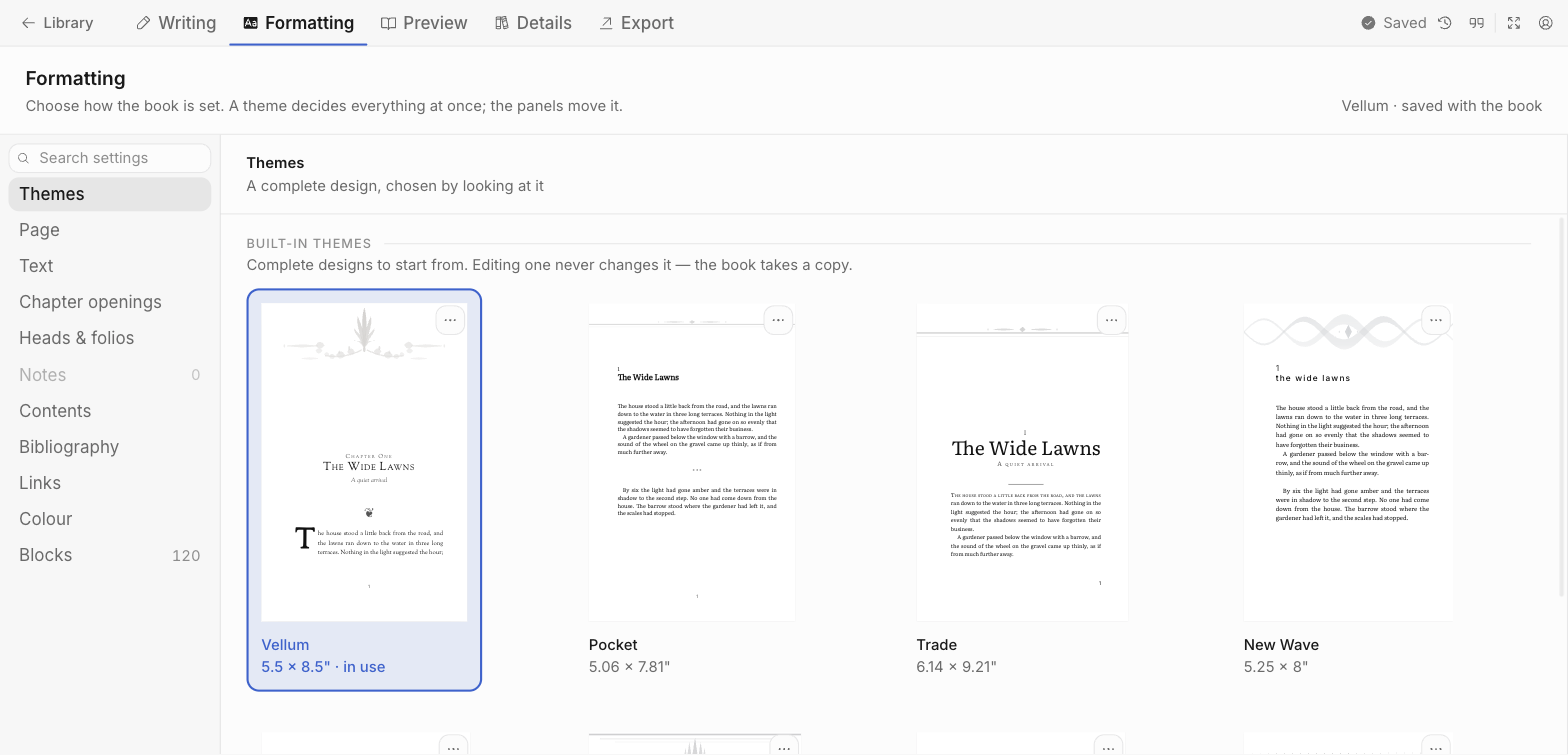
Every theme thumbnail is your book, actually typeset in that theme, not a stock image. Read it as a book
Go to Preview. The pages here are laid out by the same engine that writes the PDF, so what you approve is what the printer receives.
Set it to facing pages and scroll a few chapters. You are looking for chapter openings on the wrong side of the spread, pictures that pushed text into a bad break, and blank pages you did not expect.
PreviewTwo-page spreadFill in the details
Go to Details. Five tabs — Title, People, Publication, Discovery, Cover — each carrying a count of what is still missing from it.
The two that block a first export are an author under People and a picture under Cover: no shop will list an ebook without a cover image.
Export
Go to Export, choose PDF, and pick your shop under Checked against.
The book is checked against that shop’s published rules, and what comes back is grouped under Must fix, Worth checking and For information. Some findings carry a button that applies the fix; the rest link to the field that does.
Then click the button at the bottom. Errors do not block it — you can write a file a shop will refuse, and it says so beside the button.
ExportPDFChecked againstWrite the PDF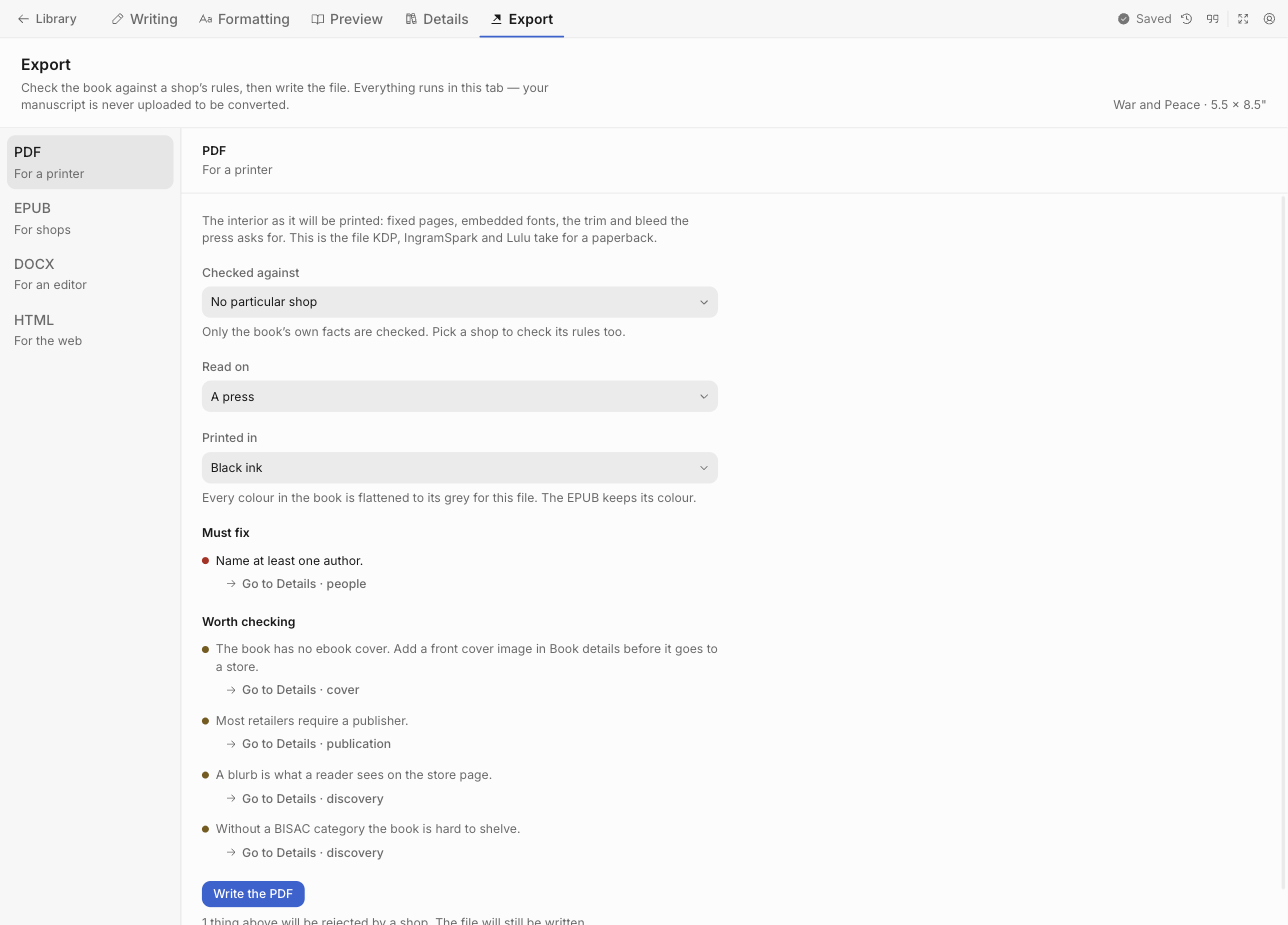
Each finding says what is wrong and where to go. Warnings do not block the export; errors tell you the shop will refuse the file, and let you write it anyway.
Then do it again for the ebook
Go back to Export and choose EPUB. It is a different file with different rules — the reader picks the type size, so your page size and margins mean nothing there — and it gets its own check.
What to read next
If your book is already in and looks wrong, go to themes and designs. If it is not in yet, importing is next.